Proxmox: Basics - 1st VM
Install your first ISO in Proxmox:
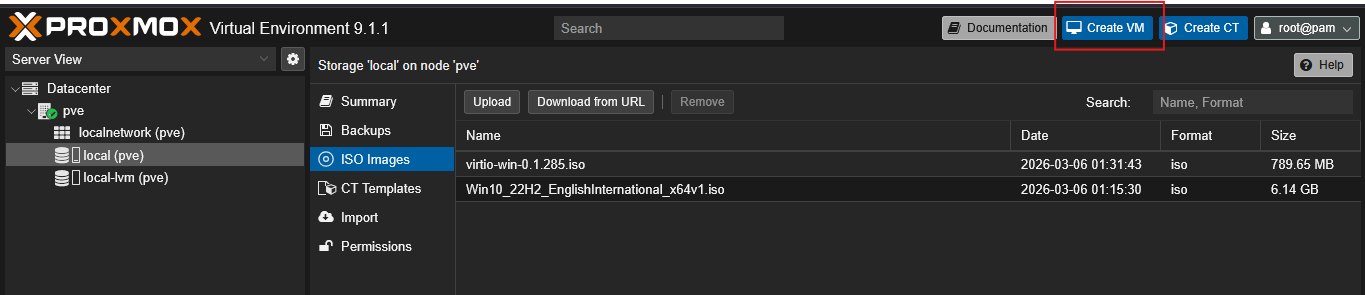
- In proxmox navigate to local (pve) and click on ISO Images.

- Depending on the choice you can choose between:
- Download the ISO directly on the Proxmox server by clicking on ‘Download from URL’ Button and entering the download link address.

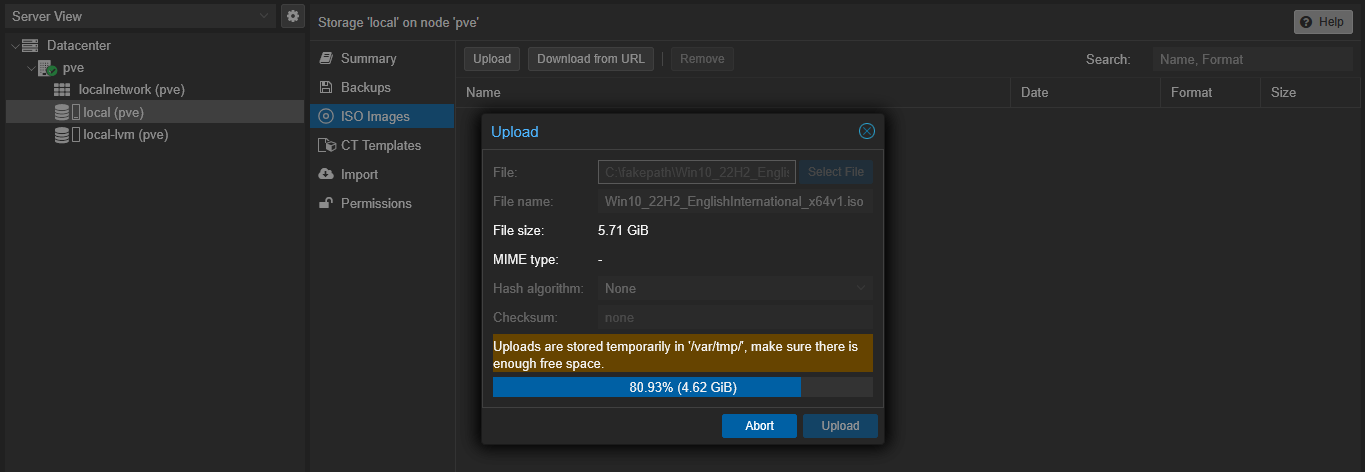
- Download the ISO of your choice outside the Promox Server
(Important: Ensure you have a Pendrive or using the same network for lowest transfer times).
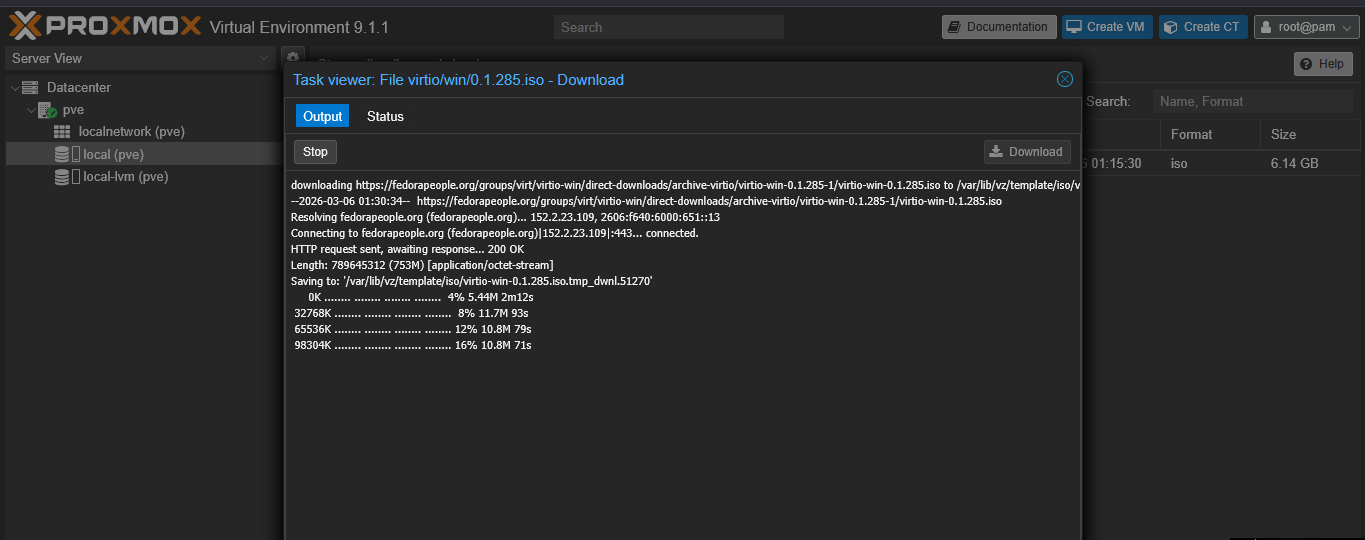
- As this is a Windows ISO, we also need to install ‘Virtio-win driver’ package for windows to work properly on Proxmox.
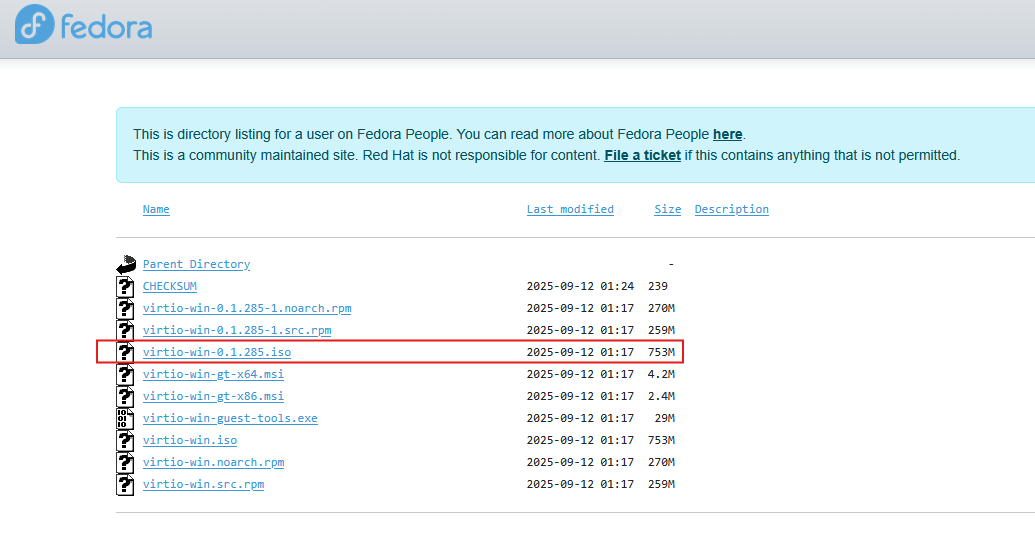
Here’s the direct iso link for the latest release (15-09-2025), you can paste it directly in ‘Proxmox > Download from URL’: https://fedorapeople.org/groups/virt/virtio-win/direct-downloads/archive-virtio/virtio-win-0.1.285-1/virtio-win-0.1.285.iso
OR
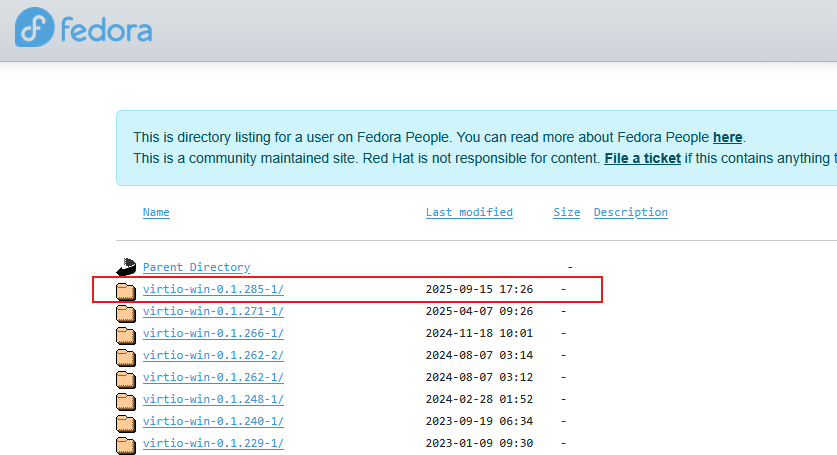
Head to the official link: ‘Virtio-win driver’ to know more or use the below mentioned direct link: https://fedorapeople.org/groups/virt/virtio-win/direct-downloads/archive-virtio/?C=M;O=D

- Choose the latest folder:
- Download the ISO:
-
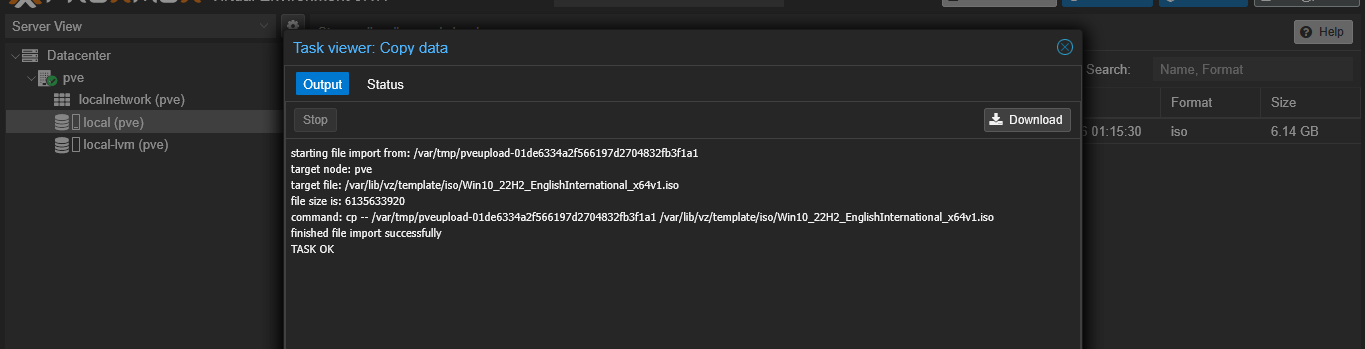
Import the ISO like we did above for Windows OS ISO.
-
Now that we have both the ISO, let’s create a VM by clicking on the Create VM button on the top right of the proxmox server screen:
- Refer to this guide for the Best Practices and how to create windows VM by Proxmox Community:
Windows 10: https://pve.proxmox.com/wiki/Windows_10_guest_best_practices
Windows 11: https://pve.proxmox.com/wiki/Windows_11_guest_best_practices
Windows Server 2022: https://pve.proxmox.com/wiki/Windows_2022_guest_best_practices
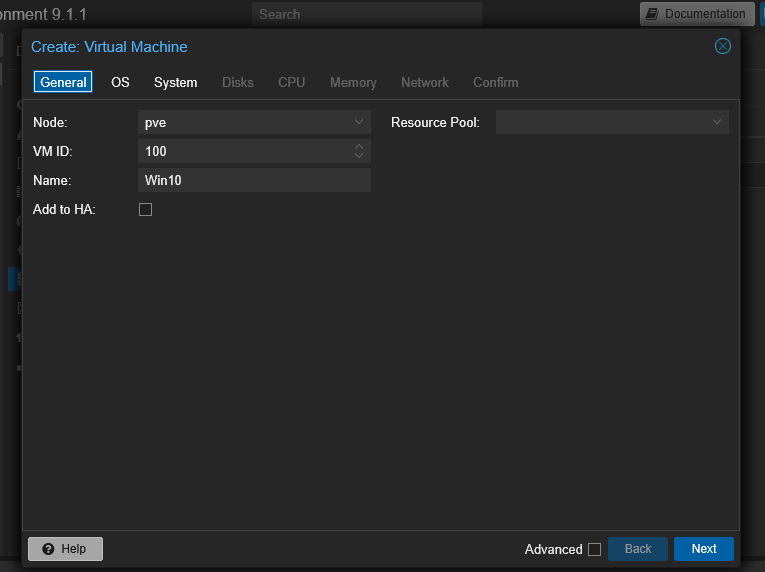
- Enter the details listed below:
Node is the virtual device name (since we only have 1 it shows pve)
VM ID is how the proxmox will denote the OS, this is a unique id.
Name: give name of your choice
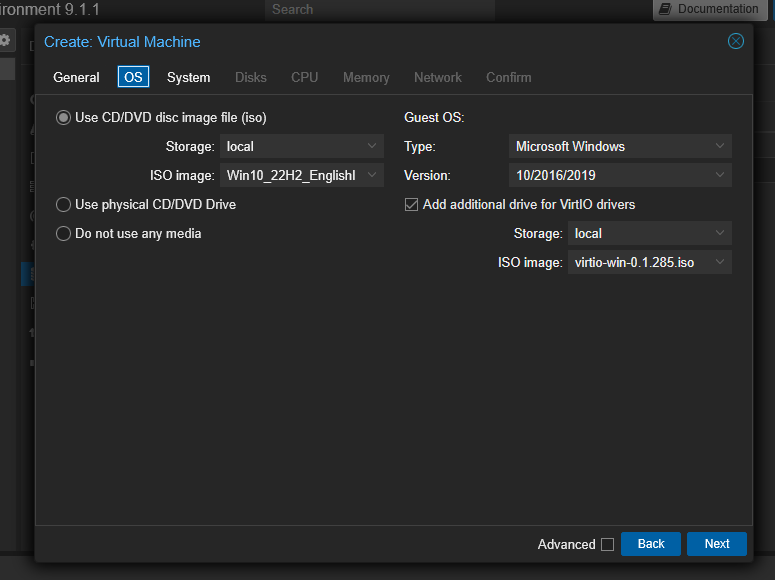
- Choose the OS image for Windows and VirtIO that we downloaded. Select the version: 10/2026/2019 as suggested in the proxmox guide shared in steps 8.
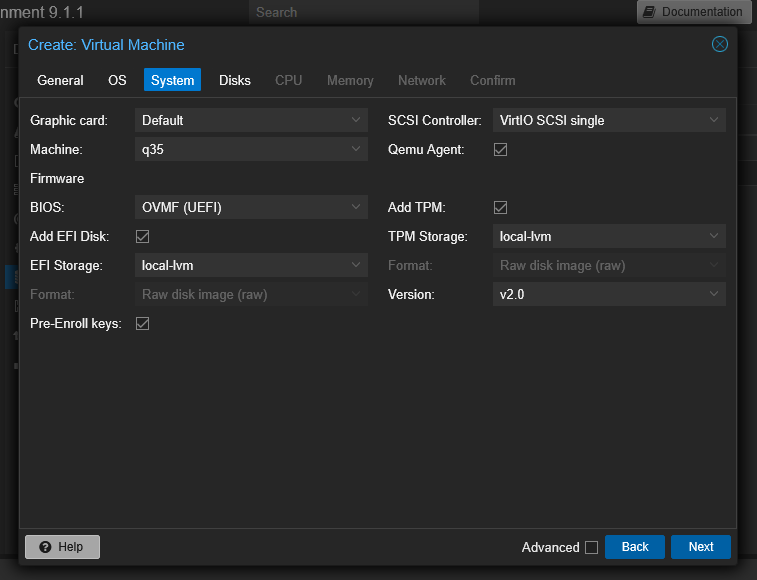
- In the System Tab, choose the following settings depending on your requirements:
| Machine Type | i440fx (Simulates a 1990s PC) | q35(Simulates a modern PCIe-based PC) |
|---|---|---|
| BIOS | SeaBIOS (Traditional Legacy BIOS) | OVMF (UEFI) (Modern UEFI interface) |
| TPM | No (Harder to upgrade to Win 11) | Yes (v2.0) (Built-in support) |
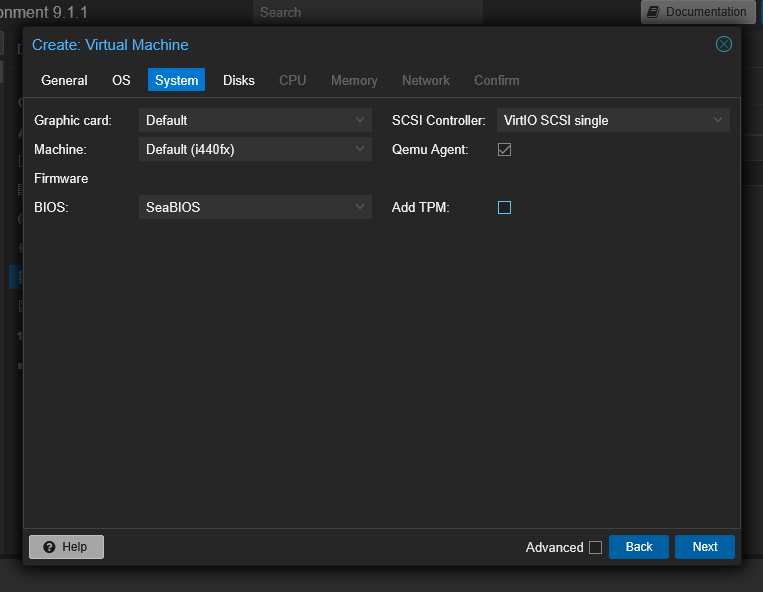
OR
- In the Disks tab, check the box for Advanced settings and change/keep the following:
-
Bus/Device: Keep it as SCSI with the VirtIO SCSI single controller for the best throughput.
-
Discard: Check this box. This enables “TRIM” support, which is vital for maintaining the health and speed of your SSD over time.
-
SSD Emulation: Check this box. This tells Windows that the virtual drive is an SSD, ensuring it optimizes its background tasks correctly.

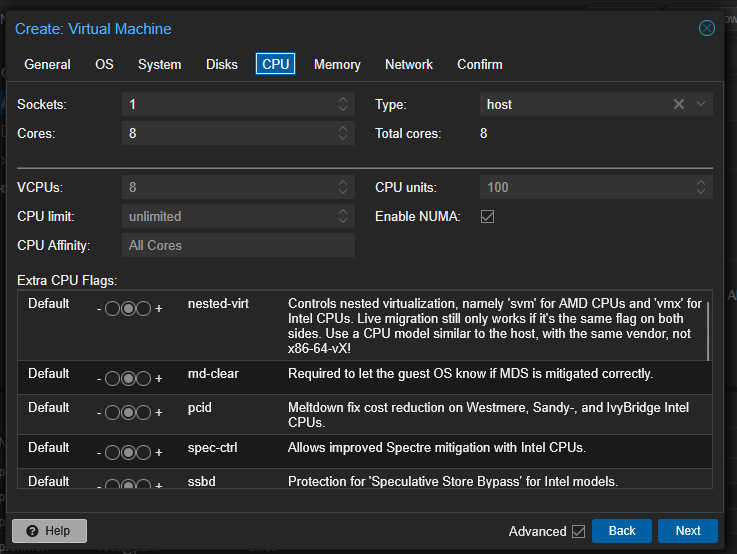
- For CPU select the Cores you want to give the OS and choose the Type as ‘Host’ to ensure every feature passes through the CPU to the OS.
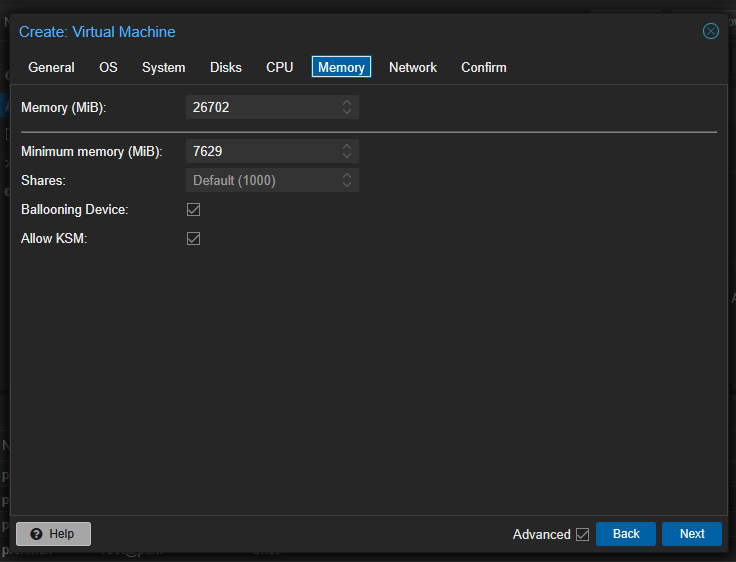
- In the Memory tab depending on the memory you have on the system set the amount of memory you want to allocate to the OS. Since I have 32GB, I’m assigning 24GB to the Windows OS leaving the rest for Proxmox.
Ensure to select the ‘Ballooing Device’ option, this is to let the VM and host share the available 32GB effectively.
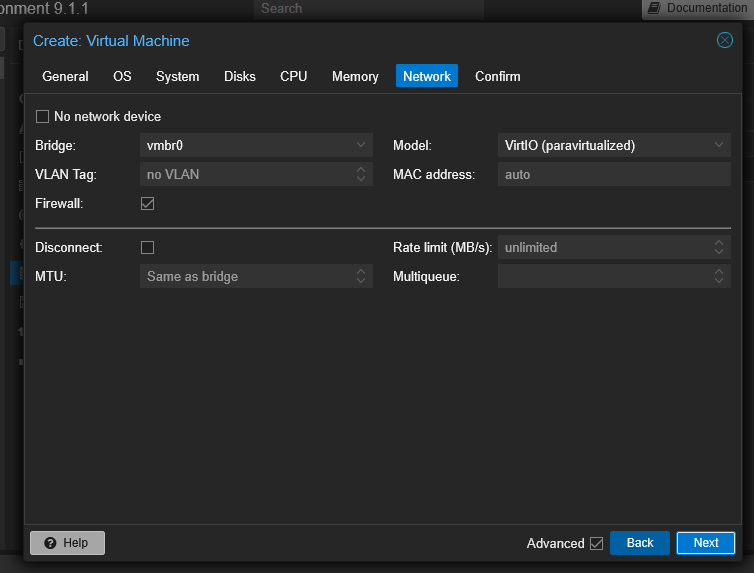
- Choose Model as VirtIO and keep the rest as defaults in the Network Tab and click on next.
-
Double check all the settings and click on Finish.
-
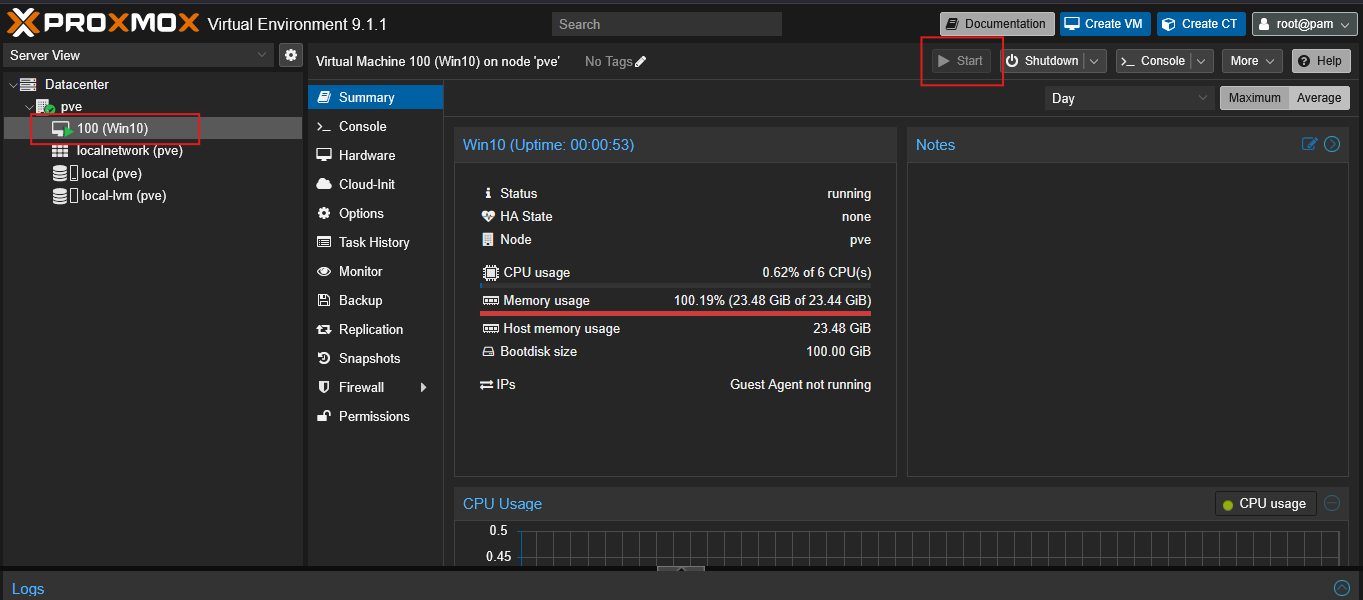
Now that the VM is created we need to go through the Windows 10 Setup Process. For this:
-
Click on the Node from the Left
-
Click on Start VM from Top Right
-
As soon as you click on Start VM, double click on the node on the Left (this is to ensure we can initialize from the CD/DVD).
-
After double clicking on the node, it will open a new Browser Window and ask you to press any key if you want to initialize the installation from the CD/DVD. Press any key on the keyboard for it to start the installation.
-
On the next screen choose the Language and Country of your choice.
-
Enter your Key or Choose ‘I don’t have key’
-
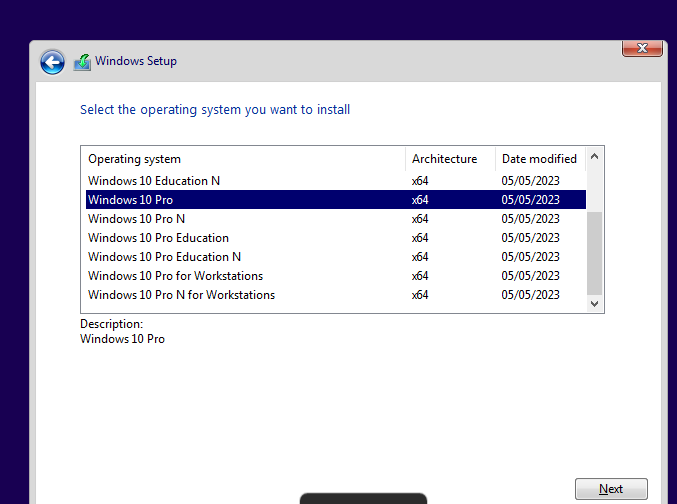
On the next step choose the Windows Type (choose the appropriate option as we can’t change this later.)
-
Accept the EULA and click Next
-
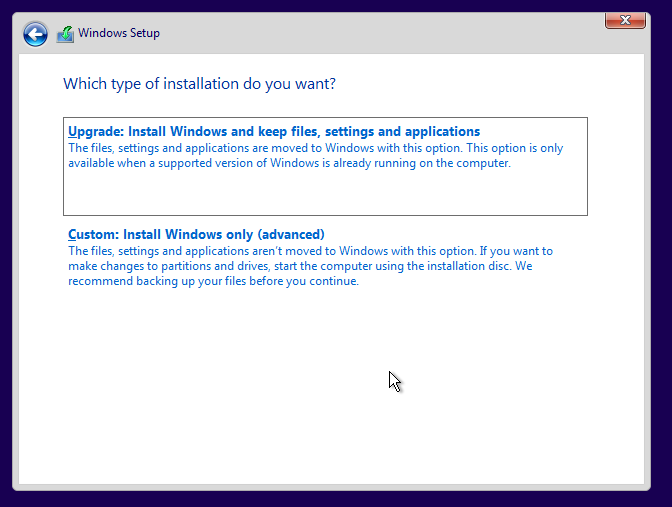
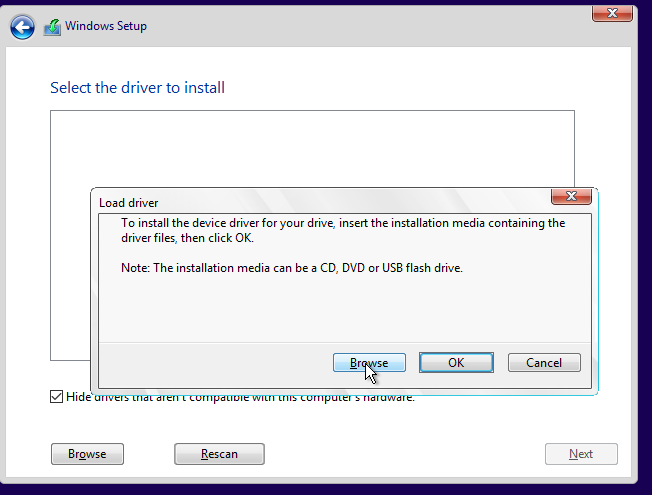
On the next screen, Windows will ask ‘Which type of installation do you want?’ Make sure to choose ‘Custom’ this is to ensure we can add the Vert-IO Drivers from the ISO that we previously downloaded.
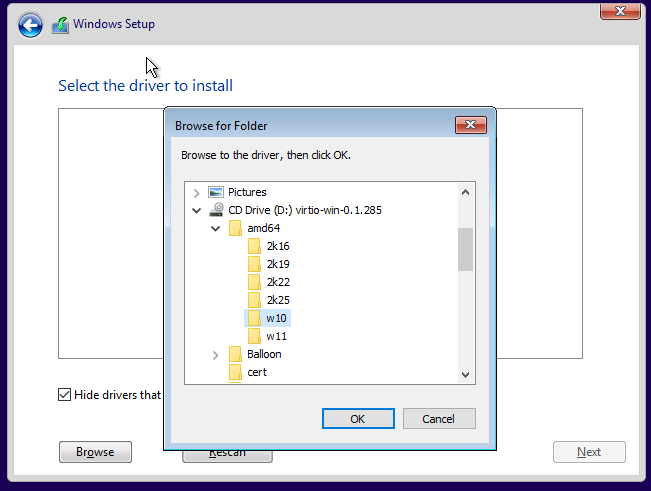
- Upon clicking ‘Custom’, you will need to click on ‘Load Driver’s and ‘browse’ the directory as follows and choose the w10 option under the CD/DVD > VirtIO > amd > w10 and click ok.
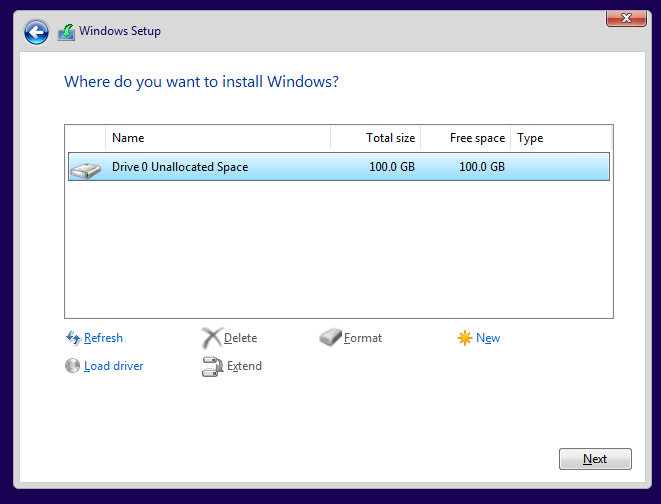
- Click on next once it shows the Pass Through Controller driver, after it initializes it should show the storage:

- Once the Drive is visible, select it and then continue with the standard Windows 10 installation:

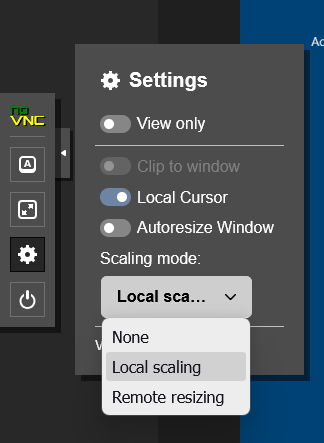
- If Proxmox doesn’t allows you to resize the Browser window then click on the small ‘Arrow button’ on the left and navigate to Settings > Disable Auto Scaling and select Scaling mode as per your requirements:
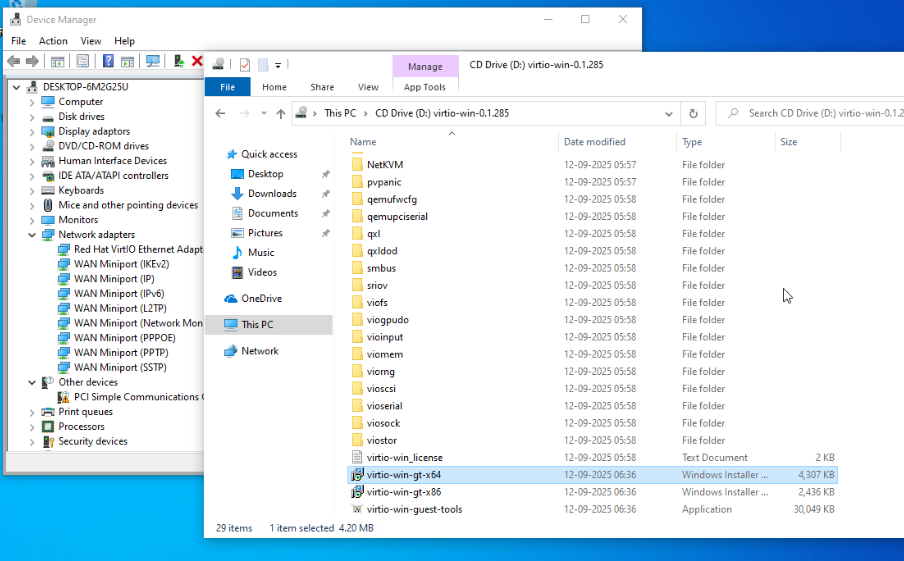
- When the Windows installation completes, navigate to Device Manager to see if you are missing any drivers. If you notice any missing drivers, you can navigate to the CD/DVD and run the VirtIO installer: virtio-win-gt-x64
- Restart your windows once the installation completes.